在上一篇中,我们定义了5个服务,eureka-service、eureka-client、feign-service、ribbon-service、zull-service,大家大概也想到了Config主要作用是什么?试想一下,我们有个电商系统,里面的项目有上百个,如果高可用算下来部署上千个服务。这么多的服务让我们的运维人员维护,如果一些服务的配置改动,手动去每个节点修改配置,是不是会疯掉?那么Spring Cloud Config很好的解决了这个问题,让我们一起看看它到底是怎么运作的。
简介
在分布式系统中,由于服务数量巨多,为了方便服务配置文件统一管理,所以需要分布式配置中心组件。在Spring Cloud中,提供了分布式配置中心组件(spring cloud config),它支持把配置文件放在配置服务的内存中(即本地),也支持放在远程Git仓库中。在spring cloud config组件中,有两个角色,一是config server,二是config client。
构建Config Server
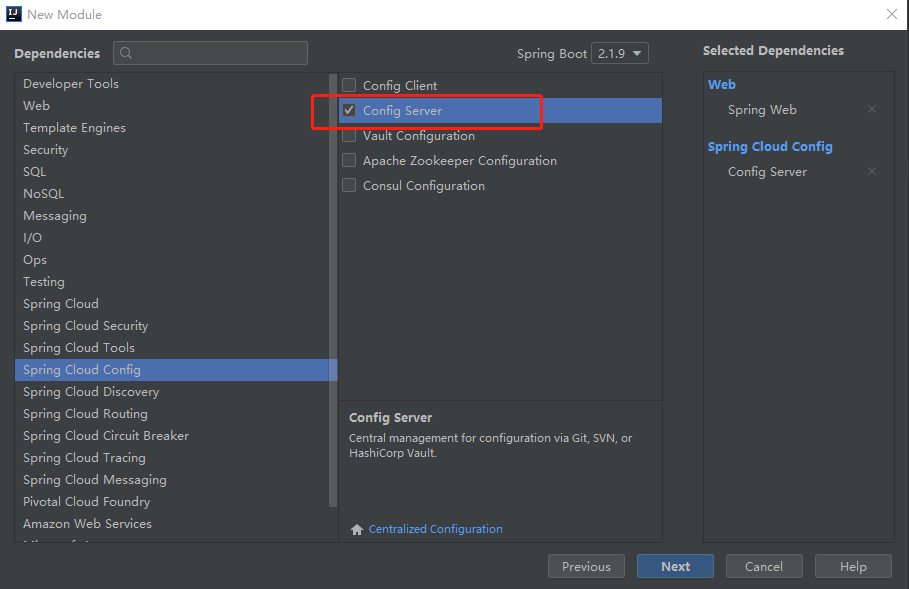
创建一个项目,取名config-server:
![]()
![]()
pom.xml文件内容:
1
2
3
4
5
6
7
8
9
10
11
12
13
14
15
16
17
18
19
20
21
22
23
24
25
26
27
28
29
30
31
32
33
34
35
36
37
38
39
40
41
42
43
44
45
46
47
48
49
50
51
52
53
54
| <?xml version="1.0" encoding="UTF-8"?>
<project xmlns="http://maven.apache.org/POM/4.0.0" xmlns:xsi="http://www.w3.org/2001/XMLSchema-instance"
xsi:schemaLocation="http://maven.apache.org/POM/4.0.0 https://maven.apache.org/xsd/maven-4.0.0.xsd">
<modelVersion>4.0.0</modelVersion>
<parent>
<groupId>org.springframework.boot</groupId>
<artifactId>spring-boot-starter-parent</artifactId>
<version>2.1.9.RELEASE</version>
<relativePath/> <!-- lookup parent from repository -->
</parent>
<groupId>com.noodles.mars</groupId>
<artifactId>config-server</artifactId>
<version>0.0.1-SNAPSHOT</version>
<name>config-server</name>
<description>Config Server</description>
<properties>
<java.version>11</java.version>
<spring-cloud.version>Greenwich.SR3</spring-cloud.version>
</properties>
<dependencies>
<dependency>
<groupId>org.springframework.boot</groupId>
<artifactId>spring-boot-starter-web</artifactId>
</dependency>
<dependency>
<groupId>org.springframework.cloud</groupId>
<artifactId>spring-cloud-config-server</artifactId>
</dependency>
</dependencies>
<dependencyManagement>
<dependencies>
<dependency>
<groupId>org.springframework.cloud</groupId>
<artifactId>spring-cloud-dependencies</artifactId>
<version>${spring-cloud.version}</version>
<type>pom</type>
<scope>import</scope>
</dependency>
</dependencies>
</dependencyManagement>
<build>
<plugins>
<plugin>
<groupId>org.springframework.boot</groupId>
<artifactId>spring-boot-maven-plugin</artifactId>
</plugin>
</plugins>
</build>
</project>
|
在项目启动类上注解@EnableConfigServer:
1
2
3
4
5
6
7
8
9
| @EnableConfigServer
@SpringBootApplication
public class ConfigServerApplication {
public static void main(String[] args) {
SpringApplication.run(ConfigServerApplication.class, args);
}
}
|
配置文件内容:
1
2
3
4
5
6
7
8
9
10
11
12
13
14
15
16
17
| spring:
application:
name: config-server
cloud:
config:
server:
git:
uri: https://gitee.com/wangs-noodles/spring-cloud-config-repo.git
search-paths: spring-cloud-config-repo
username:
password:
#default-label: master
label: master
server:
port: 8090
|
- spring.cloud.config.server.git.uri:配置git仓库地址
- spring.cloud.config.server.git.searchPaths:配置仓库路径
- spring.cloud.config.label:配置仓库的分支
- spring.cloud.config.server.git.username:访问git仓库的用户名
- spring.cloud.config.server.git.password:访问git仓库的用户密码
公开仓库可以不填写用户名和密码
远程仓库https://gitee.com/wangs-noodles/spring-cloud-config-repo.git 中有个文件config-client-dev.yml文件中有一个属性:
name=Mars
启动程序:访问http://localhost:8888/config-client/dev
1
| {"name":"config-client","profiles":["dev"],"label":null,"version":"bd15c791db91e31f066ed3c66f573109838339da","state":null,"propertySources":[{"name":"https://gitee.com/wangs-noodles/spring-cloud-config-repo.git/config-client-dev.yml","source":{"name":"Mars"}}]}
|
如果打印基本信息则表示启动正常。
http请求地址:/{application}/{profile}[/{label}]
资源文件:
/{application}-{profile}.yml
/{label}/{application}-{profile}.yml
/{application}-{profile}.properties
/{label}/{application}-{profile}.properties
示例:本例中资源文件是config-dev.properties,其中config-client就是application,dev就是profile,匹配资源文件的第三种,访问地址就是/config(application)/dev(profile)
构建Config Client
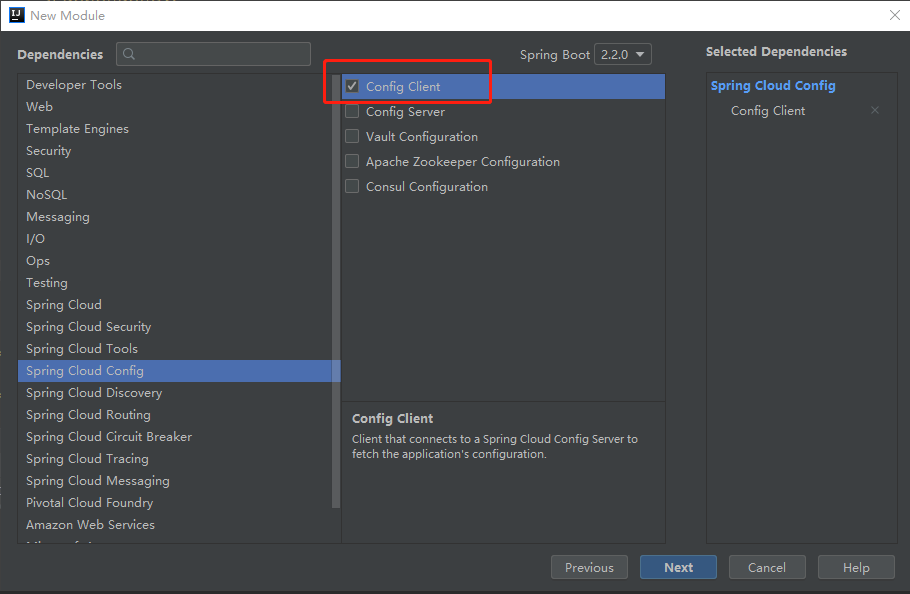
创建一个项目,取名config-client:
![]()
![]()
pom.xml文件内容:
1
2
3
4
5
6
7
8
9
10
11
12
13
14
15
16
17
18
19
20
21
22
23
24
25
26
27
28
29
30
31
32
33
34
35
36
37
38
39
40
41
42
43
44
45
46
47
48
49
50
51
52
53
54
55
56
57
58
59
60
61
62
63
64
65
66
67
68
69
70
| <?xml version="1.0" encoding="UTF-8"?>
<project xmlns="http://maven.apache.org/POM/4.0.0" xmlns:xsi="http://www.w3.org/2001/XMLSchema-instance"
xsi:schemaLocation="http://maven.apache.org/POM/4.0.0 https://maven.apache.org/xsd/maven-4.0.0.xsd">
<modelVersion>4.0.0</modelVersion>
<parent>
<groupId>org.springframework.boot</groupId>
<artifactId>spring-boot-starter-parent</artifactId>
<version>2.1.9.RELEASE</version>
<relativePath/> <!-- lookup parent from repository -->
</parent>
<groupId>com.noodles.mars</groupId>
<artifactId>config-client</artifactId>
<version>0.0.1-SNAPSHOT</version>
<name>config-client</name>
<description>Config client</description>
<properties>
<java.version>11</java.version>
<spring-cloud.version>Greenwich.SR3</spring-cloud.version>
</properties>
<dependencies>
<dependency>
<groupId>org.springframework.boot</groupId>
<artifactId>spring-boot-starter-web</artifactId>
</dependency>
<dependency>
<groupId>org.springframework.cloud</groupId>
<artifactId>spring-cloud-starter-config</artifactId>
</dependency>
</dependencies>
<dependencyManagement>
<dependencies>
<dependency>
<groupId>org.springframework.cloud</groupId>
<artifactId>spring-cloud-dependencies</artifactId>
<version>${spring-cloud.version}</version>
<type>pom</type>
<scope>import</scope>
</dependency>
</dependencies>
</dependencyManagement>
<build>
<plugins>
<plugin>
<groupId>org.springframework.boot</groupId>
<artifactId>spring-boot-maven-plugin</artifactId>
</plugin>
</plugins>
</build>
<repositories>
<repository>
<id>spring-snapshots</id>
<name>Spring Snapshots</name>
<url>https://repo.spring.io/snapshot</url>
<snapshots>
<enabled>true</enabled>
</snapshots>
</repository>
<repository>
<id>spring-milestones</id>
<name>Spring Milestones</name>
<url>https://repo.spring.io/milestone</url>
</repository>
</repositories>
</project>
|
配置文件内容:
客户端默认优先加载bootstrap.yml,即便自己写了其他配置文件,也会加载默认的bootstrap配置文件,不写的话会提示8888端口这种错误。本例配置文件直接使用bootstrap.yml:
1
2
3
4
5
6
7
8
9
10
11
| spring:
application:
name: config-client
cloud:
config:
label: master
profile: dev
uri: http://localhost:8090
server:
port: 8080
|
spring.cloud.config.label 指明远程仓库的分支spring.cloud.config.profile- dev开发环境配置文件
- test测试环境
- pro正式环境
spring.cloud.config.uri = http://localhost:8090 指明配置服务中心的网址
新建一个控制器HelloController, 提供一个API接口 /hello, 返回配置中心读取的 name 变量的值:
1
2
3
4
5
6
7
8
9
10
11
| @RestController
public class HelloController {
@Value("${name}")
private String name;
@GetMapping("/hello")
public String hello() {
return String.format("Hello, My name is %s!", name);
}
}
|
启动项目, 浏览器访问:http://localhost:8080/hello :
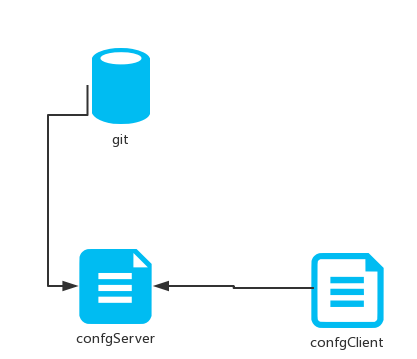
这就说明,config-client从config-server获取了name的属性,而config-server是从git仓库读取的,如图:
![]()
结合Eureka
和常规的Eureka使用没有太大差别,唯一不同的就是client中bootstrap.yml对应配置
1
2
3
4
5
6
7
8
9
10
11
12
13
14
15
16
17
18
| spring:
application:
name: config-client
cloud:
config:
label: master
profile: dev
discovery:
enabled: true
service-id: config-server
server:
port: 8080
eureka:
client:
service-url:
defaultZone: http://localhost:9090/eureka/
|
只需要删除spring.cloud.config.uri,并添加spring.cloud.config.discovery.enabled=true 和 spring.cloud.config.discovery.serviceId=config-server
点击进入源码仓库